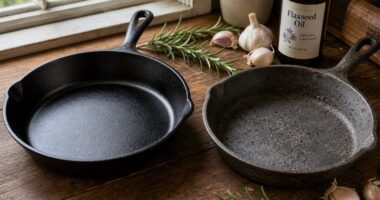

Restoring rusted cast iron cookware requires a sequence of mechanical cleaning, chemical treatment, and repeated seasoning to rebuild a protective cooking surface. Each stage removes oxidation and replaces it with polymerized oil that bonds to the iron.
- Steel wool removes surface rust by abrading oxidized iron without damaging the underlying pan structure.
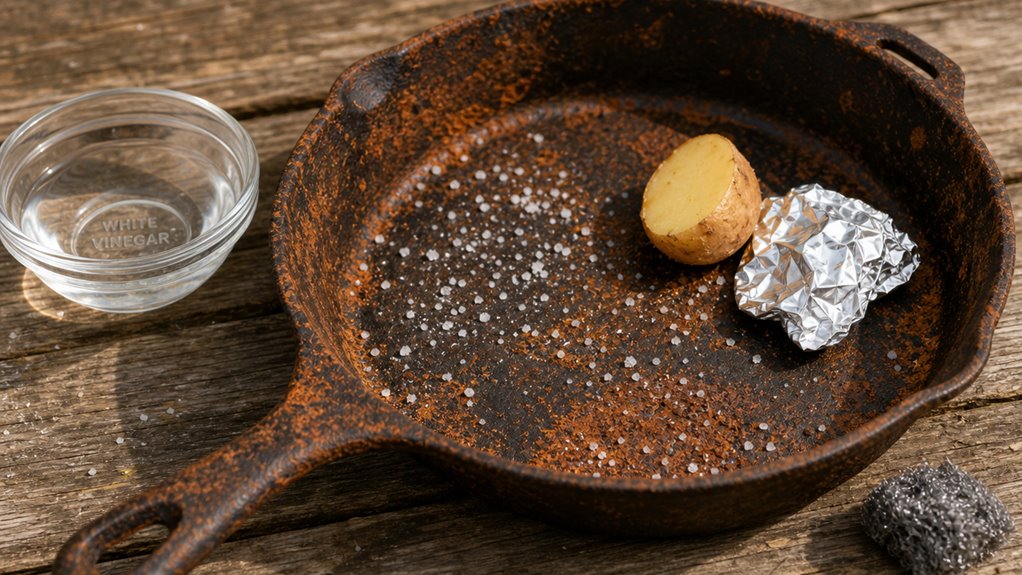
- White vinegar dissolves rust chemically when diluted in a 1:1 ratio with water, though prolonged soaking can etch the metal.
- High-smoke-point oil polymerizes during oven seasoning, forming a hard, non-stick layer that protects cast iron from moisture.
Dry-brushing with a plastic scraper loosens flaking rust before wet cleaning begins. Scrubbing with fine steel wool or a chain-mail pad in hot, soapy water removes the remaining orange film. For heavier rust, a white-vinegar-and-water soak of roughly 30 to 40 minutes dissolves oxidation that mechanical scrubbing leaves behind. Checking the pan every ten minutes during the soak prevents the acid from etching the surface.
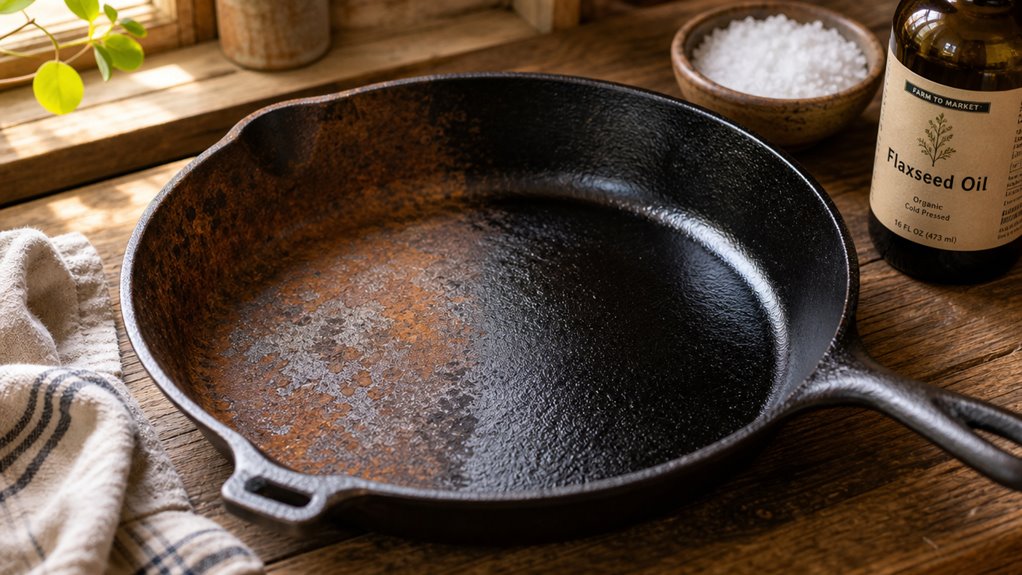
After rinsing, thorough drying protects the bare metal from immediate re-oxidation. A thin coat of high-smoke-point oil applied to the dry surface prepares the pan for seasoning. Baking the skillet upside-down at around 450 degrees Fahrenheit for one hour allows the oil to polymerize fully.
Repeating the oil-and-bake process two to three additional times builds a durable seasoning layer. Each cycle adds depth and hardness to the surface, improving the pan’s resistance to rust and its cooking performance over time.
Cast iron cookware has been used continuously for roughly 2,500 years, and properly maintained pieces are often passed down across multiple generations without significant degradation.
Cheap or expensive is the wrong question. Cost per use is the honest one. Check out our new Calculator.
Cost-Per-Use Calculator →The restoration comes down to a short, repeatable sequence:
- Dry-brush loose rust. Scrape flaking rust off with a plastic scraper before any wet cleaning.
- Scrub in hot, soapy water. Use fine steel wool or a chainmail pad to lift the remaining orange film.
- Soak heavier rust in diluted vinegar. Mix white vinegar and water 1:1, soak for 30 to 40 minutes, and check every ten minutes so the acid does not etch the iron.
- Rinse and dry completely. Dry the bare metal fully, on the stovetop if needed, to stop flash rust.
- Oil thinly and bake. Wipe on a whisper-thin coat of high-smoke-point oil such as grapeseed, then bake upside-down at about 450 °F for one hour.
- Repeat two to three times. Each oil-and-bake cycle rebuilds the polymerized seasoning that keeps rust from returning.
Key Points
- Remove loose rust with a dry plastic scraper and gentle steel‑wool (0000–00) or chainmail scrubber before any wet work.
- Soak the pan in a 1:1 white vinegar‑water solution for 30–60 minutes, checking every 30 minutes, then scrub the loosened oxide.
- Rinse thoroughly with hot water, dry completely (heat on stovetop or in oven), and prevent flash rust by immediately applying a thin oil layer.
- Re‑season by heating the oiled pan at 350‑400 °F for 1 hour, then repeat 2–3 times for a durable, non‑stick surface.
- Inspect for deep pitting or cracks; if the metal is pitted or cracked, discard the cookware, otherwise regular maintenance prevents future rust.
Why Cast Iron Rust Forms and What It Actually Damages
Iron oxide forms on cast iron whenever bare metal is exposed to moisture and oxygen, eating into the surface of a Lodge skillet and breaking down the polymerized oil layers that make up the seasoning.
Surface rust remains shallow and can be scrubbed away without lasting damage, but pitting indicates that the metal itself has been removed, leaving small cavities in the cooking surface.
The seasoning and finish bear the real cost of corrosion; the structural integrity of the pan stays sound unless pitting spreads across a significant portion of the cooking surface.
How quickly rust advances depends on how well the seasoning was built up, how the pan was stored, and whether moisture had prolonged contact with bare metal.
Understanding what rust actually attacks, and what it leaves untouched, shapes every decision about prevention and restoration.
Proper drying after each wash helps prevent moisture exposure that leads to rust.
How Iron Oxide Eats Into a Lodge Skillet’s Bare Surface
When moisture and oxygen find a spot where the seasoning’s gone, the bare iron on a Lodge skillet starts an electrochemical reaction that turns the metal into hydrated ferric oxide.
That iron oxide is lighter than the steel underneath, so it expands and swells, creating a spongy layer that flakes off.
Each time it flakes, a tiny piece of the matrix leaves, roughening the surface and exposing more iron to water.
The gray cast‑iron casting contains graphite flakes, and the rust preferentially eats the iron matrix around them, leaving the graphite a little undercut.
Over weeks of repeated cycles, the surface becomes micro‑pitted, which makes future seasoning harder to stick and lets moisture linger longer.
In short, cast iron rust doesn’t just discolor; it slowly eats away at the skillet’s bare face, turning solid metal into a porous, weak crust.
Limited oxygen conditions favor the formation of magnetite (Fe₃O₄), which can act as a protective layer if it remains sealed from air and moisture.
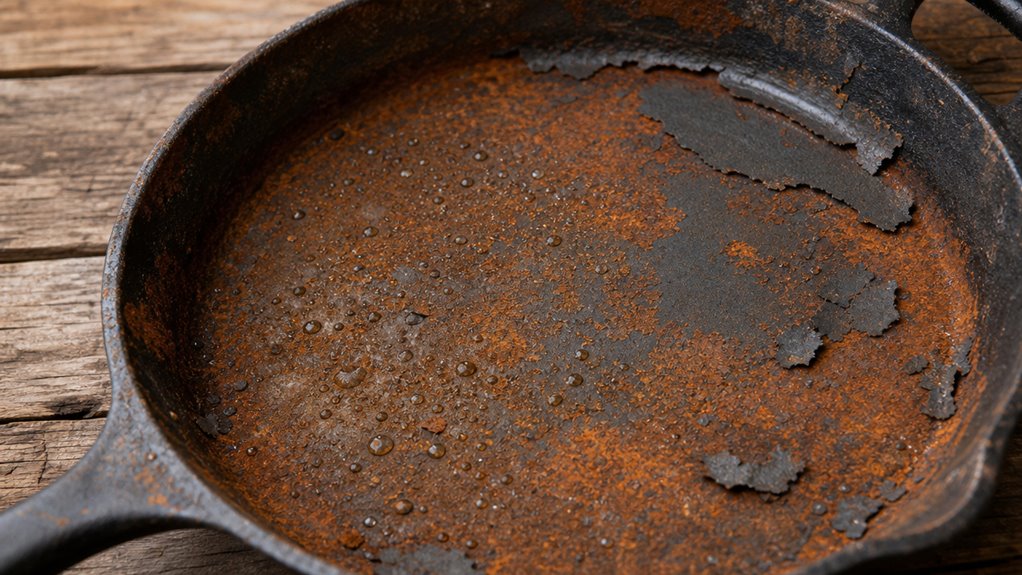
Surface Rust Versus Deep Pitting You Can Feel With a Fingernail
If moisture hangs on a cast‑iron pan long enough, the iron reacts with oxygen and forms a thin, flaky orange layer we call surface rust. Surface rust is cosmetic; it sits on top, can be scrubbed off, and you restore the pan with a quick re‑season. Deep pitting, however, feels like a tiny trench when you drag a fingernail across the cooking surface. Those pits are actual metal loss, permanent cavities that seasoning can only mask, not fill. Understanding the difference between surface rust and pitting helps you decide whether to scrub, soak, or retire the piece. To remove rust from cast iron, start with a gentle steel‑wool scrub for surface rust, and limit vinegar soaks to 30‑60 minutes to avoid creating more pits.
Regular seasoning creates a protective barrier that significantly reduces the chance of rust forming after each wash.
| Damage type | How it feels | Fix approach |
|---|---|---|
| Surface rust | Rough, orange film | Scrub, rinse, re‑season |
| Light pitting | Tiny nail‑catch | Light sanding, re‑season |
| Deep pitting | Sharp dent, catches nail | Accept, re‑season or retire |
| Cracks | Visible break | Discard |
| Over‑soaked pitting | Etched, rough | Avoid long acid exposure |
The Beginner-Friendly Tools and Supplies You Already Own
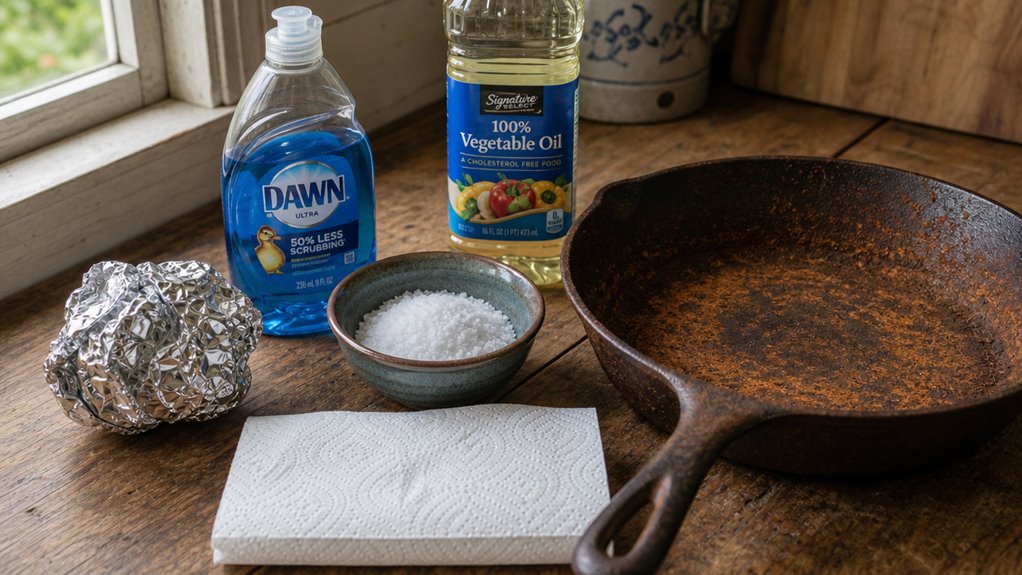
Beginner-friendly rust removal relies on abrasive tools and mild acidic solutions that are commonly found around the house, and neither requires specialized equipment or prior cast iron experience. Steel wool and chainmail scrubbers are two mechanical options that loosen surface rust without scratching the casting, making them suitable starting points for most surface-level oxidation.
A diluted white vinegar soak, typically mixed at a one-to-one ratio with water, loosens surface oxide through mild acid action, though the soak should be kept to around 60 minutes to prevent pitting. Power tools such as wire wheels and angle grinders carry a real risk of irreversible surface damage and fall outside the scope of beginner-appropriate technique.
The details that follow cover how each approach works and where its practical limits lie. Add a small amount of hot water to aid cleaning and ensure thorough rinsing after scrubbing.
Steel Wool, Chainmail Scrubbers, and the 5% White Vinegar Soak
Because rust on a cast‑iron skillet can be stubborn yet still removable, you’ll want tools that are both effective and gentle enough not to scar the metal. A 5% white vinegar soak (1:1 vinegar‑to‑water) loosens surface rust in 30‑60 minutes; rinse promptly and dry. For light rust, a chainmail scrubber works with hot water and a pinch of kosher salt, preserving seasoning while clearing discoloration. If the pan shows heavier crust, fine steel wool (0000‑00) removes it without deep scratching, but it sheds fibers that must be rinsed away. Always oil the skillet right after drying to stop flash rust. Never use a dishwasher when cleaning cast iron to avoid damaging the seasoning.
| Tool | Best Use |
|---|---|
| 5% vinegar soak | Cast iron rust removal – light to moderate rust |
| Chainmail scrubber | Gentle daily cleaning, light rust spots |
| Fine steel wool (0000‑00) | Medium rust, old seasoning removal |
| Coarse steel wool (0‑3) | Heavy rust, but leaves noticeable scratches |
What to Skip: Wire Wheels, Sanders, and Aggressive Power Tools
When you reach for a wire wheel or a power sander, you’re already stepping into a zone where speed trumps safety.
A wire wheel on angle grinder can shave away metal in seconds, but it also heats thin cast‑iron walls, warps edges, and drops stray wires into the cooking surface.
Power sanders strip seasoning and base metal together, leaving low spots that trap food and rust.
The aggressive action of grinding discs or flap discs can erase historic markings and thin the pan, making it prone to cracking.
Stick to gentle, hand‑held tools instead.
- Avoid wire wheels on angle grinders; they over‑remove material.
- Skip power sanders; they create uneven cooking surfaces.
- Ditch coarse flap discs; they leave deep scratches.
- Reject heavy grinding wheels; they thin walls and generate sparks.
The Step-by-Step Method to Remove Cast Iron Rust Safely
Removing rust from cast iron safely means dissolving surface oxidation with a diluted vinegar solution before scrubbing away the loosened material with steel wool.
A mixture of equal parts white vinegar and water, applied as a soak lasting no more than around 30 minutes, breaks down the orange-brown rust without etching or damaging the underlying iron.
Steel wool then lifts the softened residue back to a clean, gray, bare surface without gouging the casting.
When rust buildup is thick, the vinegar soak typically outperforms steel wool alone, reducing the physical effort required and helping prevent deeper surface pitting.
The sections ahead cover each stage of this process in detail.
The Vinegar-to-Water Ratio and the 30-Minute Soak Limit That Prevents Pitting
A 1:1 mix of white vinegar and water does the job without turning your skillet into a chemistry experiment.
Use a 1:1 white vinegar to water (50/50 mix) in a plastic bucket big enough to fully submerge the pan. Set a timer for 30 minutes, then lift the skillet and give it a quick brush check. If rust still clings, return it for another short soak, no more than 10‑15 minutes at a time, until the surface loosens. Rinse thoroughly and dry before moving on to seasoning.
- Keep the solution at 5 % acidity; stronger vinegar speeds etching.
- Submerge completely to avoid tide‑line pitting.
- Check every 30 minutes; stop as soon as rust lifts.
- Limit total soak to 40‑60 minutes to protect the iron.
Scrubbing Back to Bare Gray Metal Without Gouging the Iron
If you start with a gentle scrub, you’ll keep the iron’s original texture intact while still getting rid of the orange‑brown rust. Begin by dry‑brushing loose flakes with a plastic scraper, then rinse the pan in hot water.
Apply a fine‑grade steel wool (000/00) or a stiff nylon pad, keeping the surface wet with warm, soapy water. Work in broad, even strokes, checking often; the gray metal will appear uniform once the rust lifts.
Rinse and dry periodically to see progress, and stop as soon as the entire cooking face is light‑to‑medium gray. This gentle method restores the pan without gouging the iron and leaves it ready to re-season with its original feel intact.
When a Vinegar Soak Beats Steel Wool on a Crusted Lodge Pan
After scrubbing the pan to a uniform gray, you’ll likely notice that the remaining crust still clings stubbornly.
A vinegar soak beats steel wool on a crusted Lodge pan because the acid penetrates the rust layer, loosening it without the harsh friction that can gouge the casting. You’ll dilute white vinegar and water 1:1, submerge the pan, and check every 30 minutes. Once the rust lifts, a gentle scrub with a nylon brush finishes the job. Rinse, dry, and season right away to prevent flash rust.
- 50/50 vinegar‑water mix is safe and effective
- Check at 30‑minute intervals, never exceed eight hours
- Light scrub after soak removes loosened rust
- Immediate drying and seasoning lock in protection
How to Re-Season Cast Iron After Rust So It Never Returns
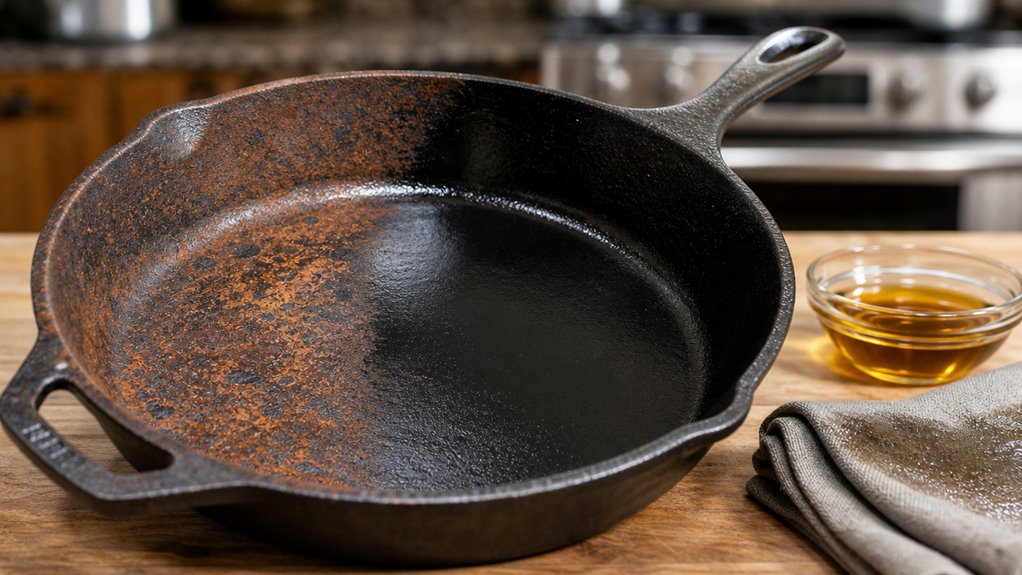
Re-seasoning cast iron after rust removal means stripping the compromised surface and rebuilding a polymerized oil layer that bonds directly to the metal and resists moisture long-term.
Choosing an oil with a high smoke point, such as grapeseed oil, helps the coating cure evenly in the oven rather than pooling into a sticky, gummy film.
Each layer should be applied as a whisper-thin coat and baked at around 470 °F for approximately one hour, with the process repeated several times to build a durable, sealed finish.
The number of seasoning rounds matters: a single layer rarely holds against daily use, while three or more coats create a surface stable enough to block the oxidation that caused the rust in the first place.
What follows covers the full process in detail.
The Thin-Coat Oven Method That Rebuilds the Polymerized Layer
When the rust is gone, the real work begins: rebuilding a thin, polymerized oil film that shields the iron and gives it a reliable non‑stick surface.
First, dry the skillet thoroughly and preheat it at 200 °F for 10 minutes to open the pores.
Then, apply a microscopic amount of oil, about ⅛ teaspoon for the whole interior, then rub it in, and wipe it off until the surface looks matte, not shiny.
Place the pan upside down in a 450‑500 °F oven for an hour, then let it cool slowly inside the oven.
Repeat 2‑6 times for a durable polymerized oil layer that will keep rust at bay.
- Use a high‑smoke‑point oil (flaxseed, grapeseed, or canola).
- Wipe excess oil until the pan is dry and matte.
- Bake each coat for 1 hour at 450‑500 °F, upside down.
- Cool slowly in the closed oven for 30‑120 minutes after each coat.
Why Grapeseed Outlasts Flaxseed for a Fresh Post-Rust Layer
The thin‑coat oven method gets the rust off and leaves the pan ready for seasoning, but the oil you choose decides whether that layer will survive the next round of cooking.
Grapeseed oil’s polyunsaturated profile gives it a flexible polymer film that bends a little as the pan heats and cools, so it sticks and resists cracking. Flaxseed oil makes a very hard, glass‑like coat that can craze and flake when you drop the skillet or scrub it aggressively.
Grapeseed also has a smoke point near 410°F, letting you bake several thin coats without burning, while flaxseed oil starts to smoke around 225°F and can scorch if you’re not exact.
The result is a seasoning that holds up to high‑heat searing and everyday use, with fewer sticky patches and less flaking over time.
When Rusted Cast Iron Is Worth Saving Versus Tossing
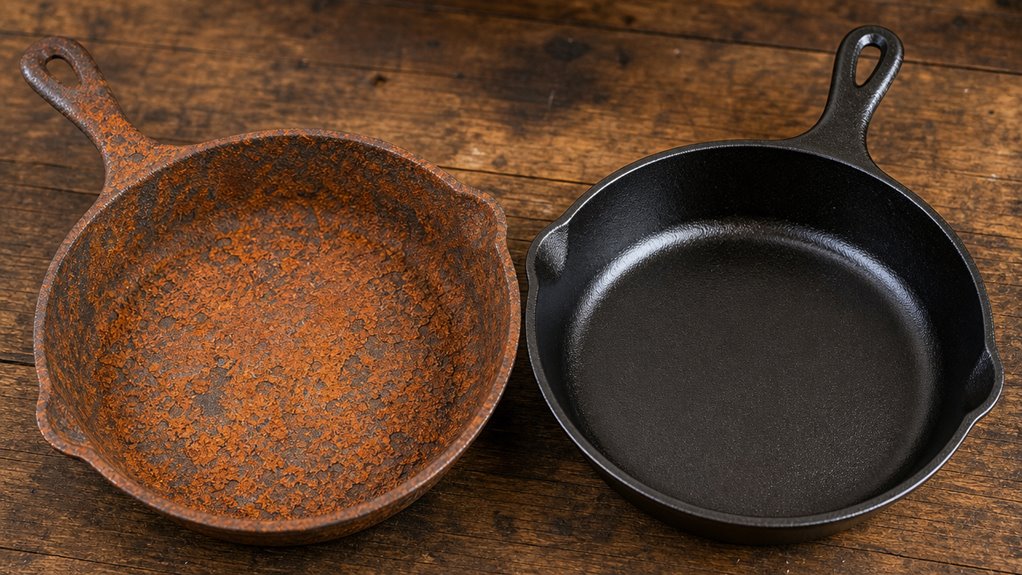
Rusted cast iron is worth saving when the damage is limited to the surface and the metal’s structure remains sound. Cracks, warps, and hairline fractures signal that a pan has reached the end of its useful life, while shallow pitting and surface rust are restoration problems, not disposal ones.
A Lodge or similarly established piece with visible pitting will typically outlast a smooth pan from a budget, unknown-brand source, because foundry quality and metal thickness shape long-term durability more than surface condition does.
Thin metal that flexes under pressure is a clearer sign of a compromised pan than rust alone.
Seasoning can rebuild a damaged cooking surface, but it can’t correct structural failure in the iron itself.
What follows covers how to assess each condition and decide which path makes sense.
Reading Cracks, Warps, and Hairline Fractures in the Casting
If you tap a rust‑covered skillet and hear a clear bell‑like ring, the casting is probably still solid; a dull thud, however, usually means a hidden crack waiting beneath the rust.
A crack often looks like a sharp line that runs from rim to center or across a handle base, and you’ll feel a tiny step when you run a fingertip over it.
Warps reveal themselves when the pan rocks on a flat surface or shows daylight underneath a small arc.
Hairline fractures are subtle but can grow under heat stress.
Deep pitting, not just surface rust, signals metal loss that may compromise strength.
- Bell‑ring test for intact casting
- Dull thud indicates possible cracks
- Flatness test exposes warping or wobble
- Light pitting can be seasoned; deep pits mean retirement
Why a Pitted Lodge Still Beats a Smooth New Pan From an Unknown Brand
You’ve already checked for cracks and warps, so the next question is whether a pitted Lodge skillet is worth the effort compared to a brand‑new smooth pan from an unknown maker.
Lodge’s casting is consistent; its wall thickness and alloy blend stay uniform even after you scrub away rust. A pitted cast iron surface can be filled by repeated seasoning, creating a grippy, non‑stick layer that a cheap smooth pan never builds because its thin casting warps under high heat.
The unknown brand may look flawless, but its metallurgical tolerances are unverified, so hidden weak spots can appear after a few seasons. In contrast, a restored Lodge tolerates steel‑wool scouring and 450‑500 °F oven seasoning without losing structural integrity.
The result is better heat retention, even searing, and a pan that improves with use, not a pan that degrades once the factory finish chips.
Frequently Asked Questions
Can I Use Lemon Juice Instead of Vinegar for Rust Removal?
Yes, you can swap lemon juice for vinegar; just keep the soak under 60 minutes, scrub with coarse salt, rinse promptly, dry thoroughly, then re‑season to lock in protection.
Do I Need to Preheat the Pan Before Re‑Seasoning?
You should preheat it. First, warm the stripped surface to drive off moisture, then apply a thin oil coat; this guarantees even polymerization, prevents flash rust, and locks in a durable seasoning.
Will a Cast‑Iron Skillet Rust Again After Dishwasher Use?
You’ll see rust return unless you strip the seasoning, dry the pan completely, and re‑season it. Dishwashers strip oil, leave moisture, and create pitting that invites oxidation quickly.
Is It Safe to Scrub Rust With a Metal Scrub Pad?
Yes, you can safely scrub rust with a metal pad. Just use moderate pressure, water, and soap, then rinse, dry thoroughly, and reseason promptly to protect the iron.
How Often Should I Repeat the Seasoning Process?
You should re‑season after each wash, then do a full oven bake every 3‑4 months, or sooner if the surface looks dull or sticky.
Conclusion
You’ve turned a rust‑caked relic into a kitchen workhorse, and the pan’s new seasoning will hold up under daily use. Follow the vinegar soak limits, scrub gently, and apply thin oil coats; the result is a non‑stick surface that won’t flake. Keep it dry, oil after each use, and you’ll avoid future pitting. In the end, the skillet’s durability matches its history, lasting as long as you treat it right.
Michael Haralson is an author, analyst, and founder of MHaralson, a publishing company. He spent five years with a San Diego catering company, cooking for events of up to 600 guests and working part-time in the main kitchen. He writes about the balance between kitchen tools that cost too much and those that fail too soon.