
Knife Sharpener Methods: The most effective approaches rely on controlled whetstones and consistent honing to restore and maintain a sharp, precise edge.
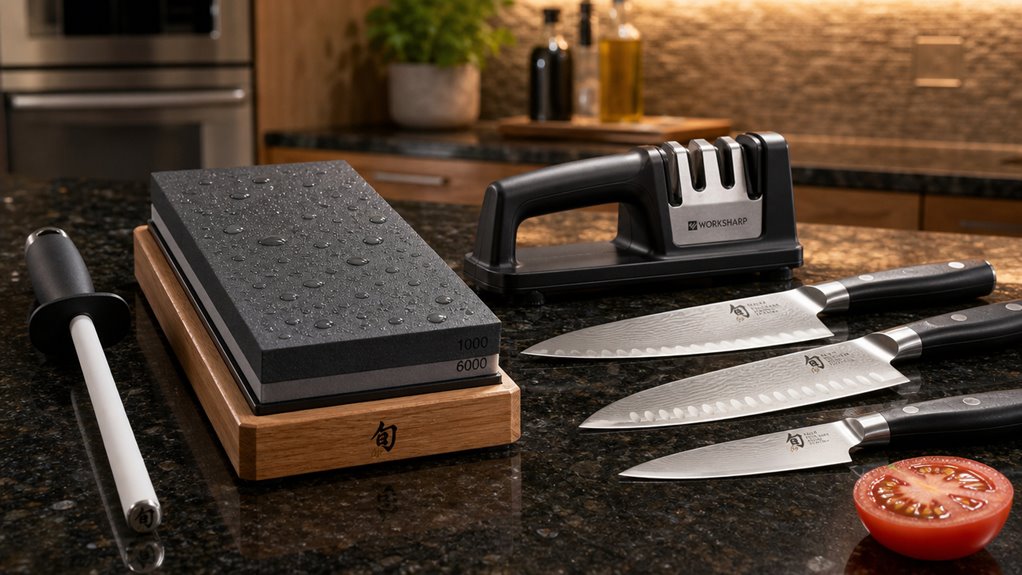
Three tools define professional knife sharpening:
- Whetstone – A whetstone removes steel deliberately and builds a clean, repeatable edge angle
- Honing Rod – A honing rod realigns the edge between sharpenings and extends blade life significantly
- Burr – A burr forms on the opposite side of the blade and signals that the apex has been reached
King Whetstone and Shapton produce reliable stones that professionals trust. Norton Abrasives supplies consistent double-sided stones used in commercial kitchens. Local culinary supply shops like Broadway Panhandler in New York City stock these stones alongside ceramic honing rods from Victorinox.
Fixed-angle pull-through sharpeners remove too much steel. They round the tip. Many electric sharpeners, including lower-tier Presto models, deliver inconsistent grit control and generate heat that damages the temper of the steel.
A whetstone requires soaking before use. The blade moves across the stone at 15 to 20 degrees per side. The sharpener watches for the burr. Progression moves from coarse grits toward finishing stones between 3000 and 6000 grit. Japanese knives from brands like Shun and Global respond best to this method. Honing follows every use.
Interesting Fact: Japanese sword polishers, called *togishi*, use a progression of up to twelve different whetstone grits to bring a blade to a mirror finish — a technique that directly influenced modern kitchen knife sharpening methods.
Key Points
- Use whetstones with a consistent 15–20° per side angle, forming a burr, then finish at 3000–6000 grit.
- Avoid pull-through sharpeners; they remove excessive steel, cause uneven pressure/angles, and dull faster due to grooved guides.
- Prefer honing for maintenance: daily honing realigns the rolled edge with minimal steel removal until sharpening is truly needed.
- Choose grit for purpose: use 1000–1500 to sharpen, then 3000–6000 to refine; skip 220–300 grit unless chips or extreme dullness.
- Apply light pressure and manage heat: moderate pressure on coarse grits, very light on finishing stones, and don’t overwork to prevent overheating.
The Three Sharpening Methods (And Why Two of Them Are Doing Damage)
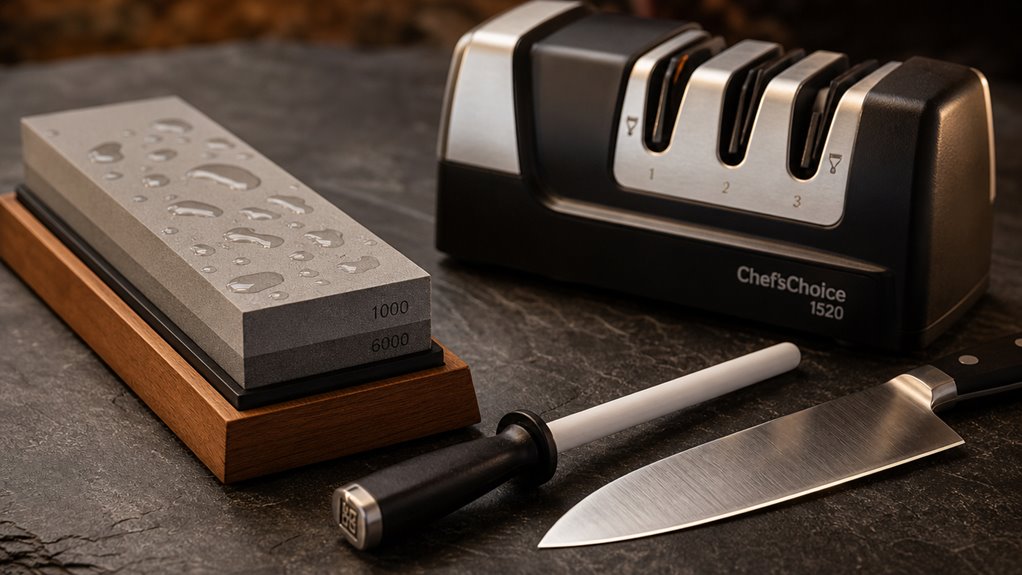
If you’re using a pull-through sharpener, you’re basically forcing a fixed angle while grinding off a lot of steel each cycle, which is why your knife gets thinner and duller faster than it should. Electric sharpeners can be quick, but they’re also hit-or-miss on grit control and they tend to work too aggressively for anything you care about, and the “do everything” versions often don’t match your knife’s edge geometry. If you want the pros’ approach you can actually maintain, you’ll stick to whetstones: soak first, run a consistent 15–20° per side through 1000–1500 grit for sharpening, then finish on 3000–6000 for that clean edge.
Honing steels realign the existing edge instead of sharpening it, so they shouldn’t be treated as a substitute when performance has already dropped.
Why Pull-Through Sharpeners Wear Out Knives Faster Than They Help
Pull-through sharpeners wear out knives faster than they help because they “sharpen” by repeatedly grinding steel off at whatever angle your pull happens to create.
With pull-through sharpening, you get inconsistent angles, uneven pressure, and heavy edge wear—chips, rounding near the tip, and weakened points. inconsistent angle That steals blade longevity.
Worse, the groove dulls too, so later pulls blunt instead of refine.
First sharpening with a pull-through sharpener often yields the best results, but after that performance typically declines rather than improves.
Where Electric Sharpeners Fit and Where They Don’t
Electric sharpeners show up as the “easy button” after pull-throughs start ruining edges, but they’re not magic. An electric sharpener is fast, yet its coarse grit strips extra steel, it can overheat, and angle control stays limited. coarse grit grinding can remove more material than you need, especially if you repeat passes more often than necessary. For real knife preservation, rely on manual sharpening for precision and consistency, especially on specialty edges; use electric only when speed matters more than longevity. Electric knife sharpeners work by grinding away metal from the blade using spinning abrasive wheels, belts, or stones.
The Whetstone Method That Professional Cooks Trust
Whetstone sharpening is the method professional cooks trust because it lets you control two things pull-through sharpeners and many electrics can’t: edge geometry and how much metal you actually remove. Whetstones work by creating a slurry when used with water, which helps lift sharpening particles against the steel. burr formation is the reliable sign you’ve reached the other side of the bevel, so you know when to switch sides. Soak, set angle control (Japanese 10–15°, German 16–18°), and use steady pressure. Keep going until burr formation appears, then lighten on finer grits. No oil either; water and slurry do the work.
How a Knife Actually Goes Dull (The Geometry That Matters)
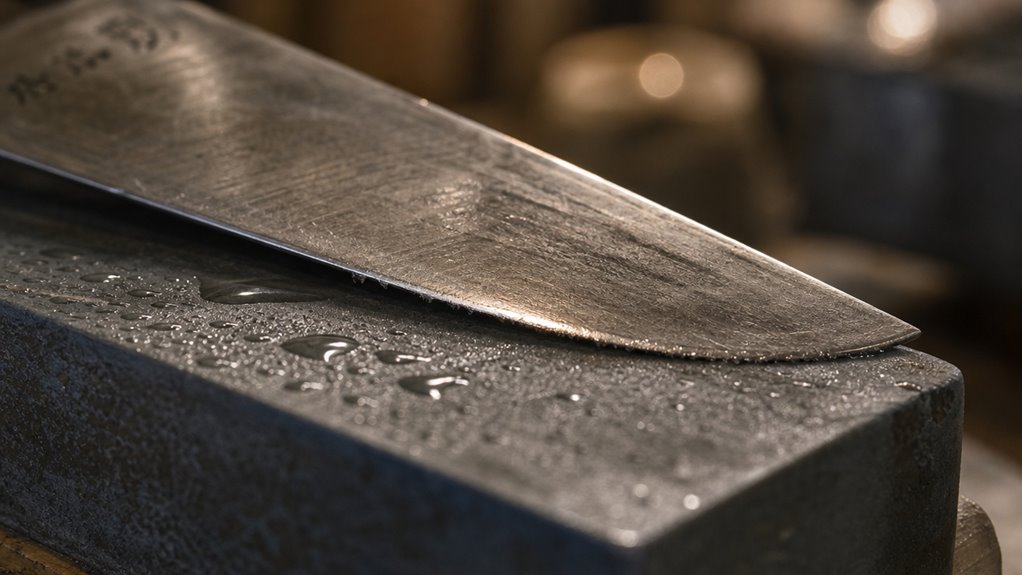
When your knife feels dull, it’s usually not “lost sharpness” so much as its edge radius spreading and rolling: the microscope view shifts from neat, linear cuts to wider, torn edges. edge radius honing and sharpening treat that geometry differently—honing realigns and straightens the edge so it cuts again without removing much steel, while sharpening reshapes the bevel and resets the edge angle. If you’re keeping up with a ceramic honing rod, you can often stretch full sharpening out to 1–2 times per year, because blade grind dullness from rolling comes back fast but steel loss doesn’t have to.
Edge Geometry Across the Microscope (And Why Honing Restores It)
How does a knife “go dull” if you can’t see anything wrong with the edge? Under a USB microscope, you’ll see light-glint patterns, scratch geometry, and even micro-chips.
During sharpening, a burr forms and must go through burr removal plus stropping, or it dulls fast.
During hands-on inspection with inexpensive USB scopes, users often find that the device’s claimed magnification doesn’t match reality (often around 40x–60x), so the same edge can look clearer or worse depending on how the photo is viewed and zoomed on a screen.
Honing rod vs sharpener matters: honing realigns a rolled edge without the steel loss. Sharpness is not absolute—it depends on usage and edge configuration.
The Difference Between Honing and Sharpening
A knife doesn’t usually “break” its edge. With honing vs sharpening, you’re choosing what problem to fix. Honing realigns the microscopic rolled edge and skips metal removal, so it stays aligned for more cuts. Honing helps maintain a knife’s edge between sharpenings. Sharpening grinds away steel, doing metal removal to rebuild a new cutting edge when abrasion has dulled the bevels. You use honing often; you sharpen less often. This edge degradation happens as the blade’s edge gradually curls and bends from regular use.
When the Honing Rod Outlasts a Decade of Daily Use
Daily dullness usually isn’t your knife “wearing out” so much as its edge geometry getting messed up: you roll the microscopic apex during normal cutting, then it stops meeting food in a clean line. For real edge maintenance, you use honing rod durability and daily honing to realign that rolled edge without removing steel. edge angle is the geometry factor most directly responsible for how easily that apex rolls and how quickly your knife needs realignment to keep cutting cleanly, and different grinds and belly/point designs can make certain edge dynamics more noticeable in everyday use. Ceramic or steel rods align – Thousands of light passes – Storage matters – Stop at light contact – Full sharpening stays rare
The Whetstone Method (And the 20-Minute Skill You’ll Have for Life)
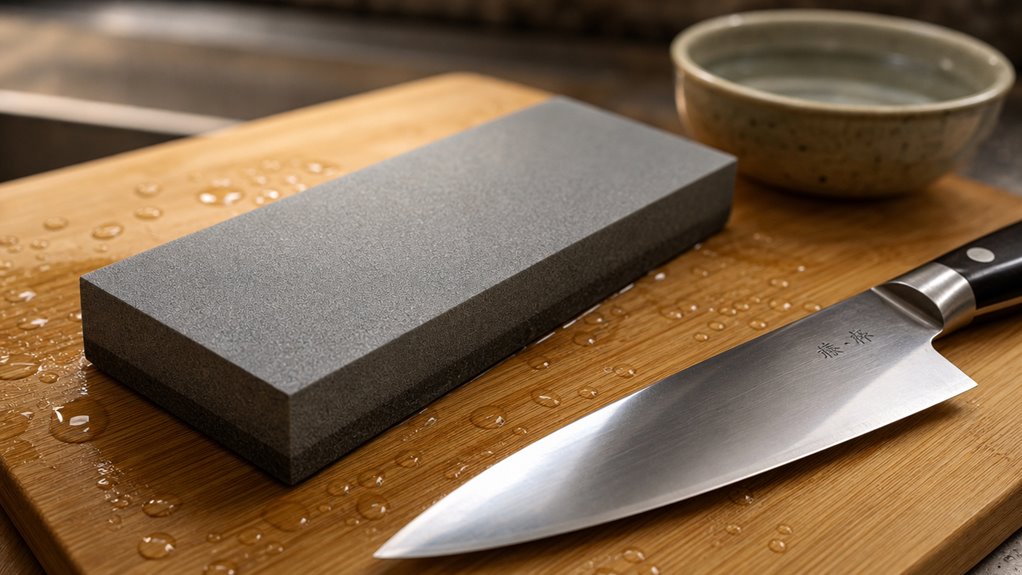
You don’t need a $200 setup to get pro results, you just need the right grit pairings (usually 1000 for the main edge, then 6000 for finishing) and to let your edge geometry drive the rest of the work.
The biggest beginner miss is angle—aim for about 15–20° per side and keep it consistent, because wobble changes what part of the bevel actually touches the stone. Determining sharpening angle means Western knives are around 20 degrees and Japanese knives around 15 degrees.
Use light, controlled pressure to form a burr without ripping steel away, and treat heavy pressure like a shortcut that shortens knife life.
Choosing a Grit Combination Without Spending $200
Choosing a grit combo without going anywhere near a $200 setup is mostly about matching the stone to the edge condition, not chasing a “perfect” sequence. For your whetstone, use a simple grit progression for maintenance sharpening:
- 220–300 only if chipped or dull
- 800–1000 for routine edges
- 3000–5000 to finish clean
- Skip 200/400 for normal upkeep
- Hone on 3000–5000 after medium
In other words, grit number tells you how coarse or fine the stone’s surface is, so you’re choosing how much material to remove instead of buying the fanciest set. Grit levels also act as a reliable “roadmap” because each step up progressively reduces visible scratch depth while increasing edge refinement.
The Angle Setting Most Beginners Get Wrong
Most beginners don’t lose sharpness because their grit is “wrong.”
They lose it because their angle wanders. For beginner sharpening, lock your wrist and move from shoulders and hips. Keep angle consistency: hit 15° for Japanese or 18–22° for Western, then hold it. When you change angle mid-stroke, you create sharpening angle mistakes that blur the edge.
The Pressure That Works (And the Pressure That Removes Too Much Steel)
Pressure decides whether you’re forming a burr and cutting cleanly—or sanding away the knife’s life for no reason. On 400 grit, start moderate pressure; after a couple minutes, increase only if no burr formation appears. On medium, keep firm but gentle and fewer strokes. On 5000–8000, lighten to polish and prevent steel removal.
- Check burr on both sides, tip to base
- Use long heel-to-tip strokes
- Apply two or three fingers behind edge
- Keep the stone wet and swarf cleared
- Stop when burr is even
When to Sharpen vs Hone (The Schedule Pros Use)
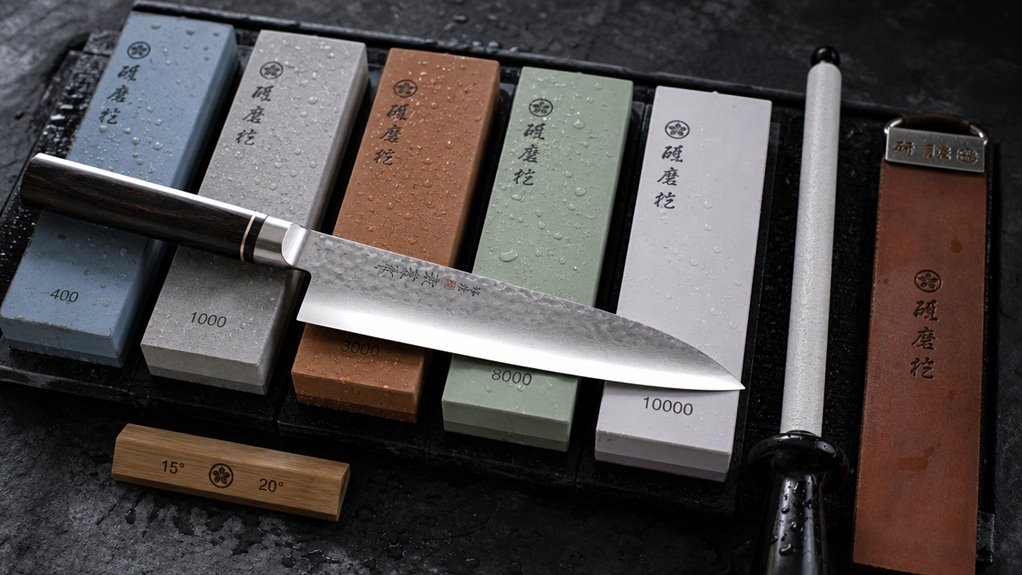
If you cook often, you don’t need a full sharpen every few months—you hone first, since honing realigns a rolled edge with essentially no metal removal. Use a quick “test strip” on produce: if your knife bites and slices cleanly, you hone; if it tears tomatoes, slides on round food, or needs sawing, you sharpen because honing won’t fix a truly dull edge.
Also watch the tool you reach for, because coarse pull-through sharpeners that force a fixed angle can take off real steel each pass, costing you years of edge life instead of just tidying it up.
Why Daily Honing Beats Quarterly Sharpening Every Time
Daily honing beats quarterly sharpening because it fixes the actual problem that shows up between full sharpenings: your edge gets rolled or slightly misaligned from real cutting, not from “steel wearing away” in big chunks. You keep proper honing, edge alignment, and a sane sharpening frequency with light, consistent strokes.
- Align the rolled edge
- Use light pressure, smooth heel-to-tip
- Hone daily or weekly
- Sharpen every 3–12 months
- Restore performance when honing can’t
The Test That Tells You Whether You Need Sharpener or Hone
So how do you tell whether you just need to hone your edge back into line, or you actually need to sharpen it? Run sharpness tests: tomato and paper slice, light inspection, cutting effort, and edge feel.
If you’re at a 7–9 scale and it feels off but passes, do honing.
If tests fail, you see chips, or honing doesn’t fix it, do sharpening.
Why Coarse Grit Pull-Throughs Cost Premium Knives Years of Edge
Coarse grit pull-through sharpeners don’t just “refresh” your edge. They remove metal each pass, so you trash edge geometry and shorten blade longevity, especially on $100–$200 knives. Expect jagged micro-bevels, burrs, and scratch patterns that tear instead of slice.
- Fixed angles
- Carbide removal
- Tool groove rounds
- Weak micro edge
- Fast dulling schedule mismatch
The Tools the Pros Actually Use (And Where to Save Money)
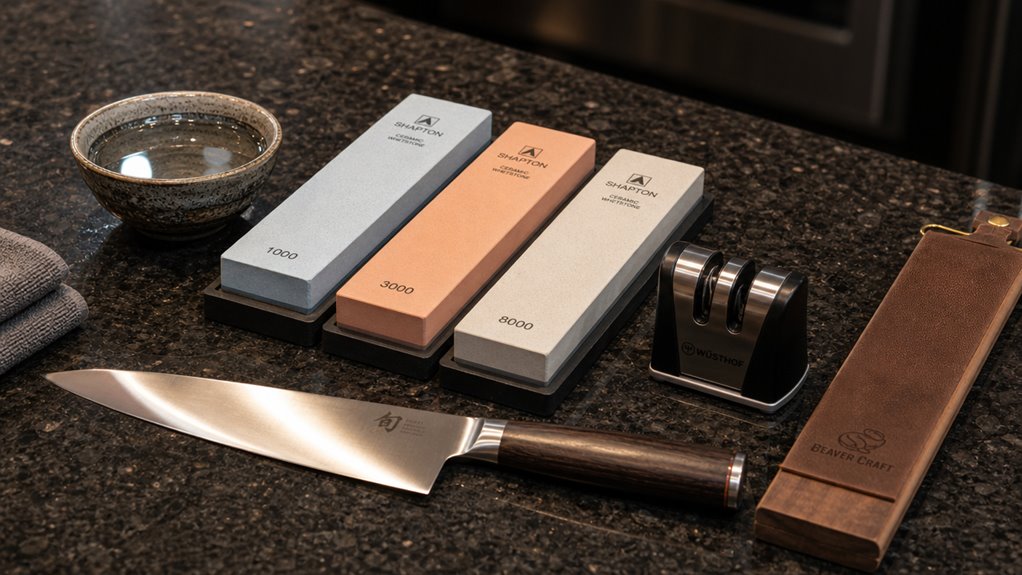
You don’t need a $200 combo stone to keep your knife in shape: a $25 1000/6000 whetstone does the real work, and it lets you control the edge angle instead of forcing a fixed one.
For between-sharpening maintenance, an inexpensive honing rod (like a ceramic one) usually outlasts the knife it’s keeping because it realigns a rolled edge with minimal material removal, but it won’t fix a truly dull blade.
If you’re tempted by coarse-grit stones, remember they’re for heavy reshaping and they can cost you lifespan fast, so you buy that grit only when you actually need to reset the geometry.
A $25 Whetstone vs a $200 Combination Stone
A $25 whetstone can absolutely handle the job most home cooks actually need, while a $200 combination stone mainly buys you consistency and longer intervals between maintenance. For cost-effectiveness, you use a whetstone for the job, then maintain it.
- Faster flattening every 20–30 uses
- Need longer 10–15 min soaks
- Premium combination stone lasts 10–20 years
- Flatter stones to 0.005 inches
- Budget limits finishing smoothness
Limitation: $25 stones need frequent flattening.
Why an Inexpensive Honing Rod Outlasts the Knife It Maintains
Even if your knife still looks “fine,” honing is the step that keeps it cutting without you eating away steel, and that’s why an inexpensive ceramic honing rod can outlast the knife it maintains. Use it for edge realignment, not sharpening. Pros get decades of durability by realigning microscopic teeth.
| What you do | What changes |
|---|---|
| Hone daily | No steel loss |
| Avoid drops | Prevent ceramic fracture |
| Clean after | Keeps the surface smooth |
When a Coarse Grit Stone Costs More Than the Premium Knife Saves
Coarse grit sounds like the part people “don’t need,” but it’s the step that keeps your knife from paying the price when it’s truly dull. Pros use coarse vs fine stones so you don’t brute-force repairs on pricey fines. That’s budget sharpening logic, not vibes.
- Coarse grit cost often matches fine
- Start at 220–600 for reshaping
- Skip ultra-fine 12000+ at home
- Fine-only takes 5–10x longer
- Use 1000 grit to finish, not polish forever
Frequently Asked Questions
Why Do Pull-Through Sharpeners Feel “sharp,” yet Ruin Knives Over Time?
Pull-through sharpeners use aggressive abrasives that quickly remove burrs, creating an immediate sharp sensation. However, they grind at a fixed, often incorrect angle, stripping excess steel and destroying the blade’s original geometry with each use, leading to a rounded, weakened edge over time.
Do Honing Rods Remove Metal, or Do Pros Really Just Realign the Edge?
Honing rods do remove some metal, but only minimal amounts. Ceramic and diamond rods are more abrasive and grind away small burrs. Steel honing rods primarily realign and straighten a rolled or bent blade edge rather than removing material. This is why honing refreshes sharpness without reshaping the blade.
What Angle Should I Use for Victorinox Fibrox Versus Japanese Gyuto Knives?
Victorinox Fibrox: 15–20° per side.
Japanese Gyuto: 10–15° per side.
Maintain a consistent angle throughout sharpening and finish with light honing strokes.
How Often Should I Sharpen My Knife if I Hone Before Every Cooking Session?
If you hone before every session, sharpen every 6–12 months. Test sharpness by slicing paper or a tomato—if the blade drags, use a 1000–6000 grit whetstone.
What Whetstone Grit Progression Do I Need to Avoid Over-Grinding?
What grit progression prevents over-grinding?
Start at 1000–1500 grit for dull edges, only dropping to 220–400 grit for chips or nicks. Finish at 3000–6000 grit for a polished edge.
How many grit steps can I skip safely?
Never jump more than 2–3 times the current grit value between stones.
What is the safest starting grit?
Always begin with the highest grit stone that still removes metal effectively for your blade’s condition.
When should coarse grits be used?
Only when visible nicks, chips, or severely damaged edges are present.
Conclusion
You don’t need a magic gadget. You need a two-step rhythm: hone often to realign the edge, then sharpen only when metal removal is actually due. Think of honing as straightening a bent signpost, not sawing new lumber. Use your whetstones in a grit progression, keep the angle consistent, and your knife stays straight instead of drifting like a tired compass. Pull-through sharpeners skip the nuance and shave too much steel.