
Cast iron cookware requires specific handling habits to build and maintain a durable seasoning layer. Beginners who skip these habits often face rust, hot spots, and damaged nonstick surfaces within the first few uses.
- Seasoning forms a polymerized oil layer that protects the metal surface and creates a natural nonstick coating.
- Heat distribution depends on gradual preheating, which allows the dense metal to warm evenly and prevents warping.
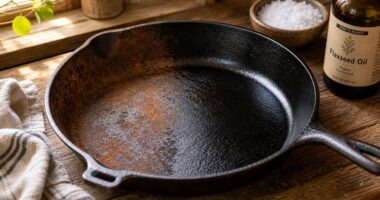
- Rust prevention relies on prompt drying, thin oil application after each wash, and avoiding prolonged water contact.
Proper preheating takes roughly 5 to 10 minutes on medium heat. Matching the burner size to the pan base, typically covering around 70 to 100 percent of the bottom, reduces uneven hot spots and protects the metal’s structure over time.
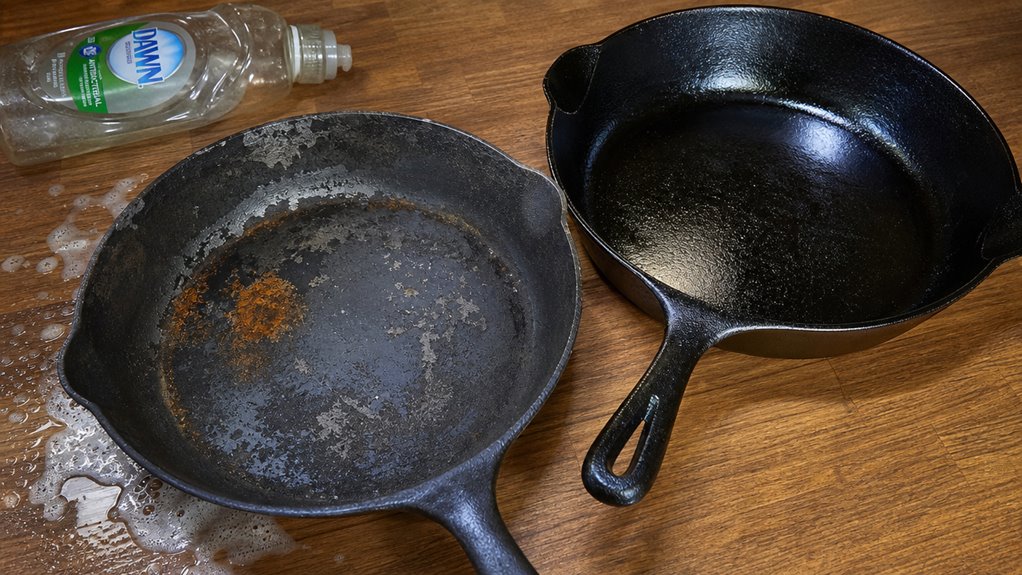
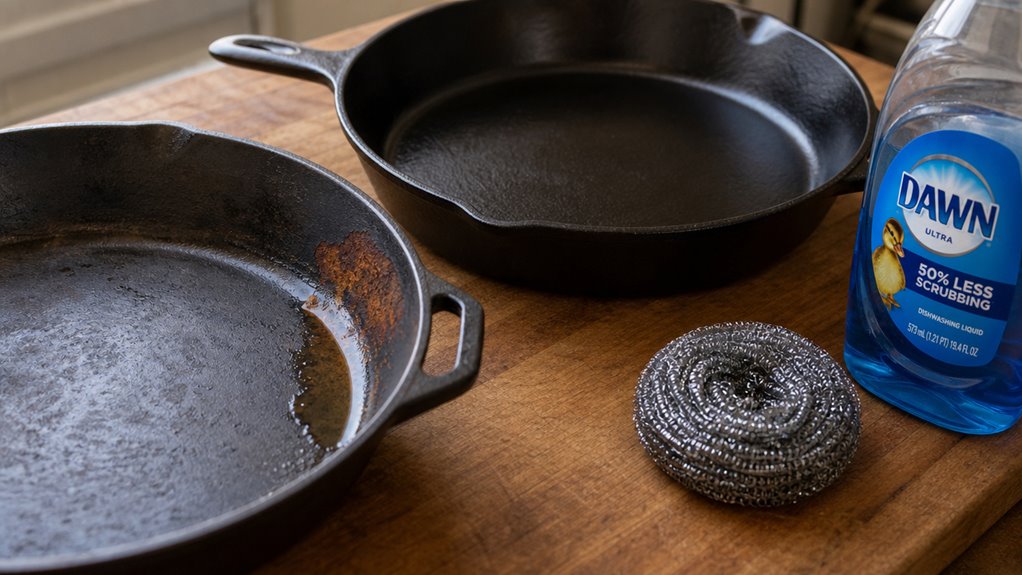
Cleaning cast iron requires a warm-water rinse, immediate drying, and a light coat of oil. Steel wool and dishwashers strip seasoning aggressively. A chainmail scrubber or soft spatula removes stuck food without damaging the surface.
Acidic ingredients such as tomatoes or citrus degrade seasoning when cooked for extended periods. Enameled cast iron handles acidic cooking without this risk because the enamel coating shields the underlying metal.
Cast iron cookware has been produced in roughly the same form since at least the early 19th century, making it one of the longest-unchanged cooking vessel designs still in widespread household use today.
Cheap or expensive is the wrong question. Cost per use is the honest one. Check out our new Calculator.
Cost-Per-Use Calculator →The mistakes that trip up most beginners fall into a short list, each with an easy fix:
- Adding food to a cold pan. Preheat slowly on medium for five to ten minutes until a water drop sizzles, or food sticks and scorches.
- Cranking straight to high heat. A sudden surge warps the base and burns off seasoning; start at medium and raise the heat only once the pan is already hot.
- Mismatching the burner to the pan. A burner covering less than about 70 percent of the base leaves a central hot spot; match the sizes and rotate the pan.
- Shocking a hot pan with cold water. The sudden contraction can crack the iron and flake the seasoning; let it cool to warm first, or rinse with warm water.
- Using the dishwasher, long soaks, or steel wool. All three strip the polymerized layer and invite rust; clean with a chainmail scrubber or soft sponge while the pan is warm.
- Skipping the dry-and-oil step. Wipe dry, heat briefly to drive off moisture, then wipe on a thin coat of neutral oil before storing.
- Long acidic simmers and gouging with metal tools. Keep tomato or citrus cooks brief on bare iron, or use enamel, and lift food rather than digging with utensils.
Key Points
- Heat the skillet slowly on medium for 3‑5 minutes, waiting for a thin oil shimmer before adding food to protect seasoning.
- Match the burner size to the pan’s base (≈70‑100 % coverage) and rotate the skillet while heating to avoid hot spots and warped seasoning.
- Clean with a warm, mild dish soap and a chainmail scrubber while the pan is warm; avoid long soaks, harsh detergents, and steel wool that strip seasoning.
- Dry immediately after washing, then heat briefly on low and apply a thin coat of neutral oil while the pan is warm to prevent rust.
- Use flat‑edged metal, silicone, or wooden utensils; avoid digging or prying with metal tools that can scratch the polymerized seasoning.
How to Use Cast Iron Without Making the Beginner Mistakes
Avoiding beginner mistakes with cast iron starts with understanding how the metal heats, because Lodge pans and similar skillets require a slow, even warm‑up before any food touches the surface, typically five to ten minutes over medium heat until water droplets sizzle and evaporate on contact.
Cast iron distributes heat unevenly when cold, and those temperature gaps create hot spots that scorch food and degrade the seasoning layer built up over time.
Matching the burner diameter to the skillet’s size helps heat spread more uniformly across the cooking surface.
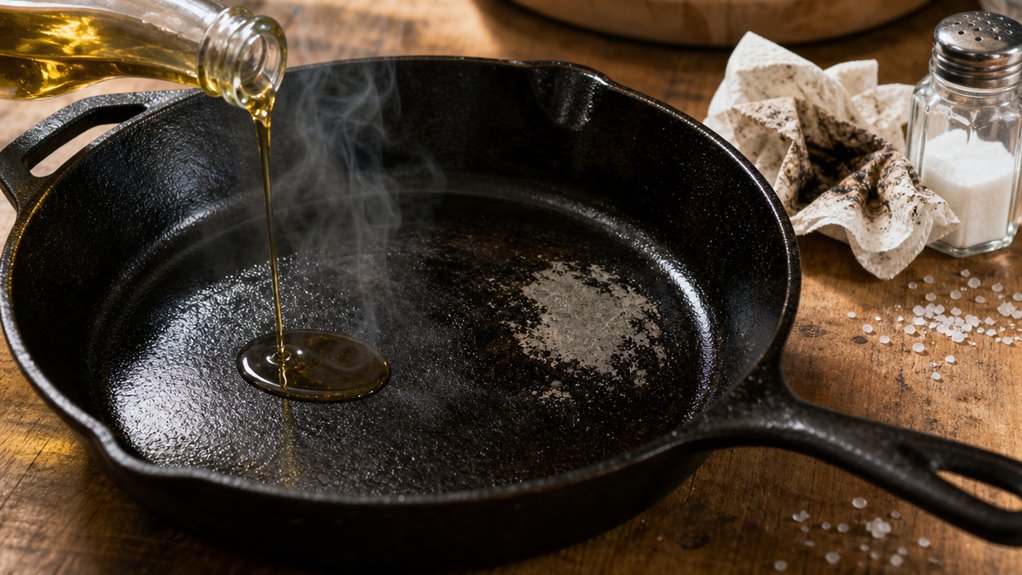
Once the pan reaches an even temperature, a thin layer of oil can be added and allowed to shimmer before food goes in, which allows clean release and protects the seasoning.
The details behind each of these steps shape how reliably the pan performs. Overheating can cause burnt seasoning and uneven cooking.
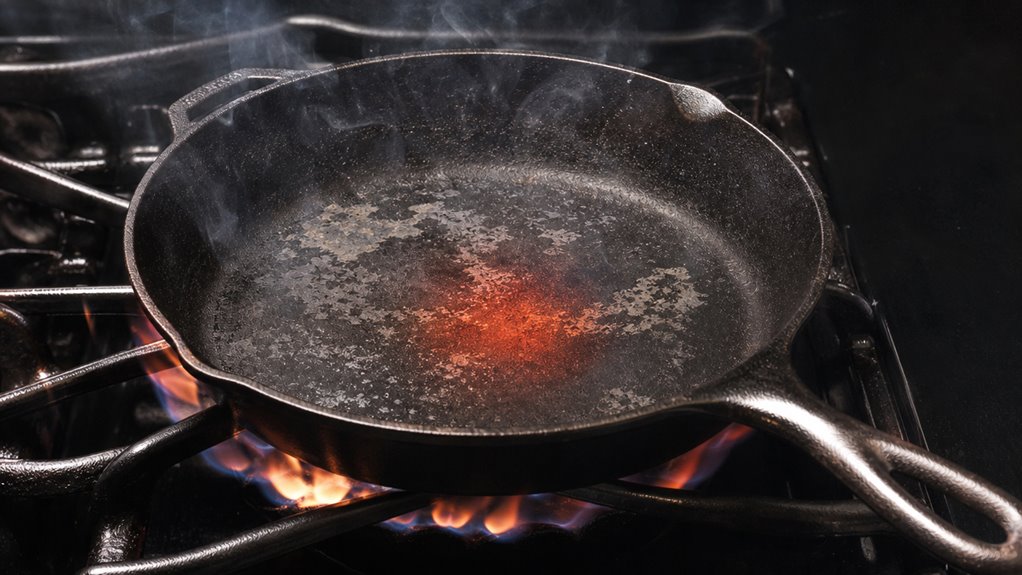
Preheating Slowly and Why Cold Lodge Iron Sticks and Scorches
Heat a cold Lodge skillet too fast and you’ll see food stick and scorch because the metal’s high heat capacity and low conductivity create uneven zones.
Cold cast iron sticks when the oil stays cool, so protein bonds instead of releasing. To avoid that, preheat cast iron slowly on medium for about four to five minutes, letting the heat spread evenly.
Rotate the pan a bit while it warms; this prevents hot spots that can burn oil. When a drop of water sizzles and disappears, or a thin oil layer shimmers, the surface is ready.
Keep the burner at a steady mid‑range; sudden jumps raise the temperature too quickly, stressing the seasoning and risking flaking. This gradual approach gives you a reliable, nonstick cooking surface. Proper seasoning fills microscopic pores and improves nonstick performance.
Matching Burner Size to the Skillet for Even Heat
Most of the time you’ll get the most even heat when the burner’s diameter covers about 70‑100 % of the skillet’s flat base. That burner–skillet size ratio keeps the flame or element from hugging just the center, which otherwise creates a central hot spot and leaves the edges cool.
On a gas range, a slightly larger flame ring helps edge heating, but let the flame climb the sides and you’ll scorch the handle. With electric or glass‑top burners, stay within two inches of the element’s footprint; otherwise the outer ring cooks sluggishly. Induction works best when the pan base matches the marked zone, and you may need a lower setting to avoid a rapid hot spot on thick cast iron. Rotate a pan that overhangs a little, but a proper match is the simplest way to keep seasoning intact and food cooked evenly.
Choosing a skillet that matches the burner size ensures optimal heat distribution for your cooking style.
Heat Mistakes That Warp, Crack, or Ruin the Seasoning
Heat mistakes warp cast iron, crack the seasoning layer, and can permanently damage the cooking surface when the pan is exposed to sudden or extreme temperature changes.
Dumping cold water onto a pan that has been raised to high heat creates rapid contraction stress in the cast iron, which is what causes visible cracking and seasoning loss.
A slow, steady rise to medium heat is enough for most cooking tasks and keeps the seasoning bonded to the metal.
Skipping patience in favor of high heat produces uneven hot spots that accelerate warping and burn off the polymerized oil layer that protects the surface.
Understanding the specific conditions that cause each type of damage makes it easier to avoid them consistently. Preheating for 5–7 minutes ensures the pan stores energy evenly and prevents sticking.
Thermal Shock: Why Cold Water on a Hot Skillet Cracks Iron
If you dump cold water on a skillet that’s just hit a high heat, the sudden temperature drop makes the metal’s surface contract faster than its hot interior, creating tensile stress that can exceed cast iron’s low shock resistance.
That’s thermal shock in action, and cold water on a hot skillet can start micro‑cracks that grow each time you quench a hot pan.
The surface contracts, the interior stays expanded, and the stress cracks the casting or warps thin edges.
Even if the pan looks fine, the seasoning may flake as the polymerized layer separates.
To avoid this, let the skillet cool to a warm touch before rinsing, or use warm water instead of a cold stream.
Gentle cooling preserves the cast and the seasoning.
Dropping a hot pan onto a cold surface can also cause thermal shock.
Cranking High Heat When Cast Iron Wants Medium and Patience
Cranking the burner to high right after you set a pan on the stove will overheat the iron before the heat can spread evenly, and that sudden surge often warps the bottom or cracks the seasoning. You’ll see the pan wobble, a clear sign of excessive direct heat.
Instead, start medium, let the iron warm for three to five minutes, and watch the oil shimmer before adding food. This gradual load keeps the metal’s shape and protects the polymerized seasoning layer.
If you need a quick sear, raise the flame briefly after the pan is already hot, not the other way around. Remember, seasoning tops out around 650 °F; anything higher erodes it and invites rust. Keep the heat steady, and your cast iron will stay level and durable.
How to Use Cast Iron Day to Day So the Seasoning Holds Up
Daily cast iron maintenance comes down to protecting the polymerized oil layer that forms seasoning, and the habits most likely to damage it are prolonged water exposure, harsh detergents, and skipping the drying step.
Soaking the pan or running it through a dishwasher strips that layer faster than regular cooking builds it back.
A chainmail scrubber with hot water removes stuck food without cutting into seasoning, and mild dish soap used occasionally won’t cause meaningful damage as long as the pan is dried promptly and recoated with a thin wipe of oil.
Heating the pan briefly on low after washing drives off residual moisture, which is the most common cause of gradual seasoning breakdown.
Understanding the reasoning behind each step makes the routine easier to follow consistently.
The Dishwasher, Long Soaks, and Habits That Strip the Layer
Usually you’ll hear that a dishwasher is a “no‑go” for cast iron, and that’s not hype. It’s chemistry. The hot water, caustic detergents, and high‑pressure spray strip the polymerized oil layer, exposing bare metal and inviting rust. Even the drying cycle leaves standing water inside, so the pan emerges damp and can flash‑rust within hours if you don’t re‑dry and oil it immediately.
Long soaks have the same effect. Leaving a pan in water softens and lifts seasoning, and standing water promotes electrochemical rust. A few hours can produce orange spots that pit the surface, making it rougher and more prone to sticking.
Every day, avoid abrasive pads, steel wool, or industrial degreasers. Rinse quickly while the pan is still warm, dry it on the burner, and wipe a thin coat of oil before storing. Skip the post‑wash oil step, and you’ll thin the layer, leading to patchy gray spots and faster rust. Store the skillet in a dry spot, not under a sink or near a dishwasher, to keep moisture from cycling back onto the surface.
Whether Dish Soap Actually Harms Modern Polymerized Seasoning
A dishwasher and a long soak are the obvious culprits for stripping a cast‑iron pan, but the myth that any dish soap will ruin a seasoned surface isn’t quite right.
You can use soap on cast iron if you keep it mild, warm, and brief. Modern detergents target free grease, not the polymerized oil layer that’s been baked into a cross‑linked film. A quick rinse with a splash of mild soap, a soft sponge, and under a minute of contact won’t thin a well‑cured seasoning.
Problems appear only with aggressive, extra‑strong degreasers, hot‑water soaks, or when the layer is still thin or uneven. After washing, dry the pan on low heat and wipe a thin coat of oil to protect the polymerized film. This routine preserves the seasoning while removing stuck food.
Why Chainmail Scrubbers Beat Steel Wool for Daily Cleaning
When you scrub a warm cast‑iron skillet with a stainless‑steel chainmail pad, the interlocking rings lift stuck‑on bits without shaving the seasoned layer, whereas steel wool’s sharp fibers act like sandpaper and wear that polymerized oil film down.
The chainmail scrubber works mechanically, not abrasively, so it breaks up carbon and food without cutting into the hard oil film. Steel wool, by contrast, erodes that film quickly, leaving a rough, sticky surface.
Use the chainmail scrubber while the pan is warm, rinse with hot water, apply light pressure, then dry and oil immediately.
The stainless rings won’t rust or shed, so you avoid metal splinters and keep the smooth surface that lets your seasoning last for years.
Storage and Moisture Mistakes That Invite Rust
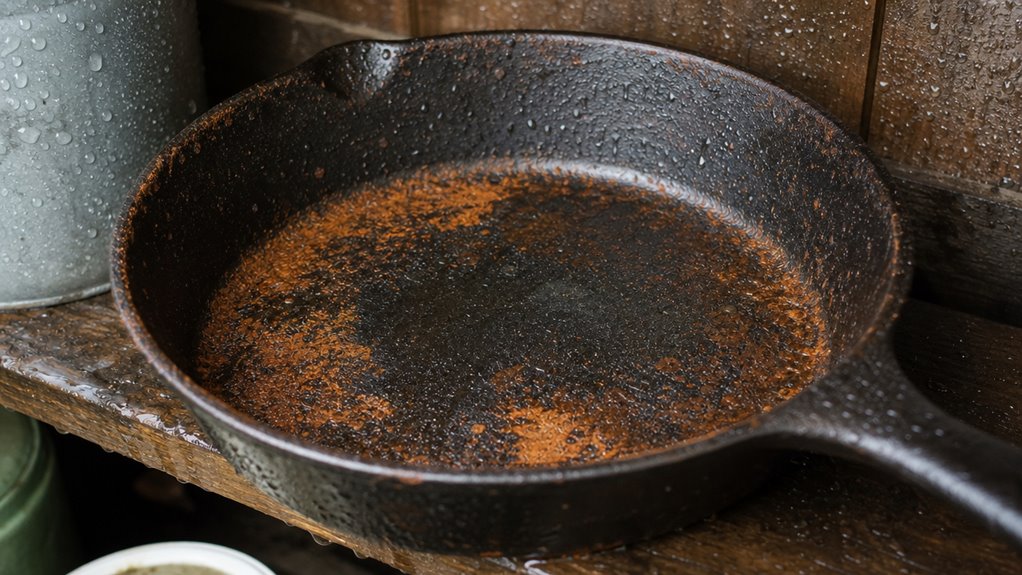
Storage and moisture mistakes invite rust by allowing water to remain on cast iron long enough to begin oxidizing the metal, and two habits address this directly: drying the pan immediately after washing and applying a thin layer of oil before putting it away.
Any residual moisture left on the surface will attack the seasoning and allow rust to form during storage, even in low-humidity conditions. Stacking pans without a barrier compounds the problem, because trapped moisture between surfaces can’t evaporate and stays in contact with the iron. Placing a paper towel or cloth between stacked pans allows air to circulate and prevents that contact.
Understanding how moisture behaves during storage helps explain the more specific guidance that follows.
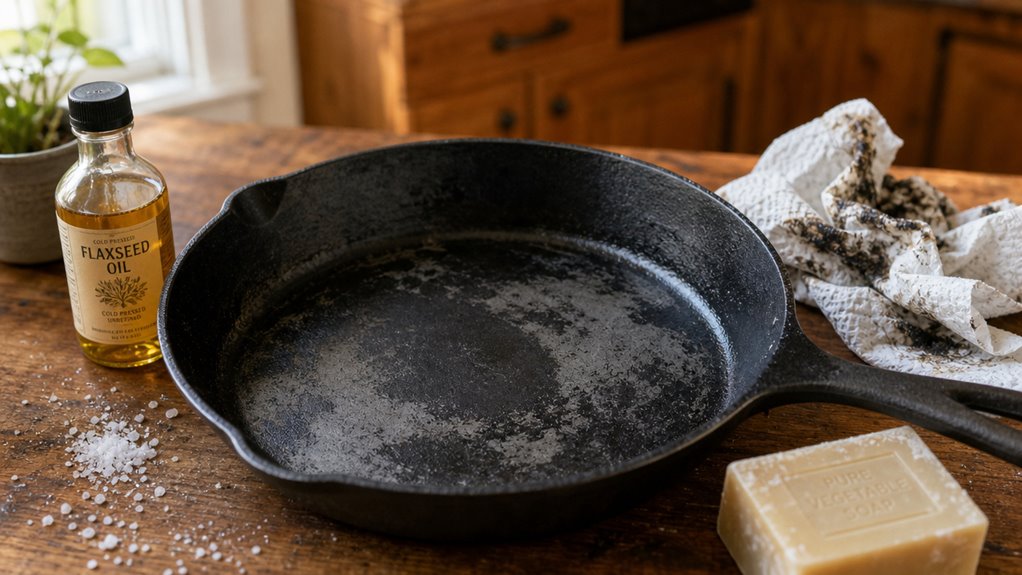
Drying Immediately and the Light-Oil Wipe That Prevents Rust
You’ll notice rust forming even after you’ve towel‑dried the pan, because microscopic moisture stays trapped in the iron’s pores.
To dry it properly, wipe the skillet with a clean cloth, then set it on a low‑medium burner for a minute or two. The gentle heat drives hidden water out of the seasoning and the handle.
While the metal is still warm, dab a thin layer of neutral oil, such as canola or vegetable, onto the entire surface. Use a paper towel to spread it evenly, then buff off any excess until the pan just glistens.
This light‑oil wipe creates a protective film that blocks ambient humidity, keeping rust at bay until your next cooking session.
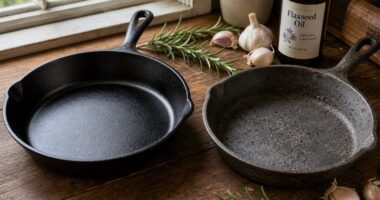
Stacking Pans Without Trapping Moisture Between Them
Directly stacking cast‑iron pans without anything between them invites two problems at once: scratches and trapped moisture. When you pile a skillet on a Dutch oven, the metal contacts transfer excess oil and can chip the seasoning. More insidiously, moisture trapped between stacked pans creates a humid pocket where rust blooms. Use a thin barrier, such as a paper towel, dishcloth, or cork spacer, between each piece. Let every pan dry completely, then separate them on a rack or hang them. The barrier keeps dust off the seasoning and gives air a path to evaporate any lingering dampness.
| Barrier | Why it works |
|---|---|
| Paper towel | Absorbs stray water, cheap |
| Dishcloth | Soft, reusable, protects finish |
| Cork spacer | Rigid, blocks contact, airflow |
| No separator | Leads to scratches, moisture trapped between stacked pans |
Tool and Technique Mistakes Worth Unlearning Early
Tool and technique mistakes often become habits precisely because they seem harmless at first. Using a metal spatula on a seasoned cast-iron pan, for example, can slowly scrape away the polymerized layer that took time to build, especially after acidic cooking like a long tomato sauce simmer that already tests bare iron’s acid tolerance.
The condition of a pan’s surface at the moment of cleaning or use shapes how well that seasoning survives, which is why a paper towel wipe or a gentle chainmail scrubber typically protects more than it removes.
Matching the right cookware to the right task also reduces cumulative damage. Enameled cast iron handles acidic dishes without flavor interference, while bare iron performs reliably when kept away from prolonged acid exposure.
Small corrections in material choice and handling technique compound over time in ways that are easy to overlook until the damage is already done.
The sections ahead examine where those errors tend to cluster and how to address them.
Metal Utensils, Acidic Foods, and What Cast Iron Tolerates
How metal utensils affect cast iron depends entirely on how you treat the seasoning. A metal spatula works fine when you lift or flip food, especially if the blade is flat‑edged and you keep the pan well‑oiled. Don’t dig, chop, or pry with it; aggressive motions can scratch the polymerized layer and expose raw iron.
When you cook acidic food, like a splash of wine or a quick tomato sauce, keep the exposure brief. Short, high‑heat sears tolerate a little acid, but long, slow braises will dissolve the seasoning and leave a metallic taste. Use stainless steel tools that are thin yet flexible, avoid metal near the rim, and reserve wooden or silicone utensils for the early seasoning stages. This approach preserves the hard, plastic‑like coating and lets your Lodge last for decades.
When a Bare Lodge Handles Tomato Sauce and When Enamel Wins
If you toss a quick tomato‑based sauté into a well‑seasoned Lodge, the sauce usually slides on, the fat cushions the acidity, and the seasoning stays intact.
For a short 10‑minute pan sauce, a bare cast iron pan works fine, especially if the seasoning is dark and glossy. The fat buffer protects the surface, and you can clean and oil it right after.
When the sauce simmers longer, the acid eats away at the seasoning, leaving a dull ring and a metallic bite.
An enamel coating prevents that reaction entirely, keeping the flavor pure and the pan safe for repeated use.
Quick guide
- Keep tomato cooks under 20 minutes on bare cast iron.
- Add generous fat to shield the seasoning.
- Switch to enamel for anything longer or more acidic.
Frequently Asked Questions
Can I Season a Cast‑Iron Pan With Butter Instead of Oil?
You can use butter for cooking, but it’s not ideal for seasoning. Its low smoke point and milk solids burn, leaving sticky residue. Stick to high‑smoke‑point oils for a durable, polymerized layer.
Is It Okay to Wash My Skillet in a Dishwasher Once a Month?
A dishwasher cycle may seem convenient, but it still erodes seasoning and invites rust. Hand‑wash, dry, and oil it; occasional dishwasher use merely trades convenience for extra re‑seasoning work.
How Long Should I Let the Pan Cool Before Storing It?
Let the pan cool completely, about 30‑60 minutes after stovetop use or 1‑2 hours after oven seasoning, until it’s no longer warm to the touch, then dry it thoroughly before storing.
Can I Use a Metal Spatula on a Newly Seasoned Surface?
Yes, you can use a metal spatula on a newly seasoned surface if you keep it flat, gentle, and avoid gouging. Light scraping actually smooths the polymerized layer, while heavy pressure or sharp edges can chip it.
Do I Need to Re‑Season After Every Acidic Recipe?
You don’t need to re‑season after every acidic dish; just rinse, dry, and lightly oil the pan. If the seasoning looks patchy or food starts sticking, then give it a quick re‑season.
Conclusion
You’ve learned that a cast‑iron skillet isn’t complicated, just a metal that responds predictably to heat, moisture, and a good seasoning. Preheat it slowly, avoid shocking it with water, and clean with a chainmail scrubber or a light scrub, not a soak. Store it dry, and you’ll keep the seasoned surface intact for years. Follow those habits, and the pan will stay reliable without the rust or cracked spots that ruin most beginners’ first attempts.
Michael Haralson is an author, analyst, and founder of MHaralson, a publishing company. He spent five years with a San Diego catering company, cooking for events of up to 600 guests and working part-time in the main kitchen. He writes about the balance between kitchen tools that cost too much and those that fail too soon.